Date: December 19, 2012 | Styling: Diane Carroll |
The holidays tend to bring out a bit of creativity from even the most reluctant crafter. This year we asked four skilled designers from the Northwest Arkansas chapter of the American Society of Interior Designers to share their top ideas for handmade holiday décor. Read on to see how they spruce up for a naturally gorgeous season.
Julie Wait Fryauf, ASID, is the owner of Julie Wait Designs in downtown Rogers. These handmade projects were a perfect opportunity to utilize all the corks she has collected from many great bottles of wine.
Sarah Savage Jaynes, ASID, of InsideOut Designs was inspired by vintage books and the appeal of a natural holiday rich in heritage. Her take on stockings, garland and gift wrap showcase this inspiration.
Angey Lyons, ASID, drew inspiration from her Southern surroundings. Her beautiful moss-covered wreath and floral spray can add a touch of evergreen beauty to any home.
Aubrey Mitchell Pate, ASID, is an adjunct professor with the University of Arkansas in Fayetteville. She worked with students in the school’s interior design program to produce a holiday tree from sheet music.
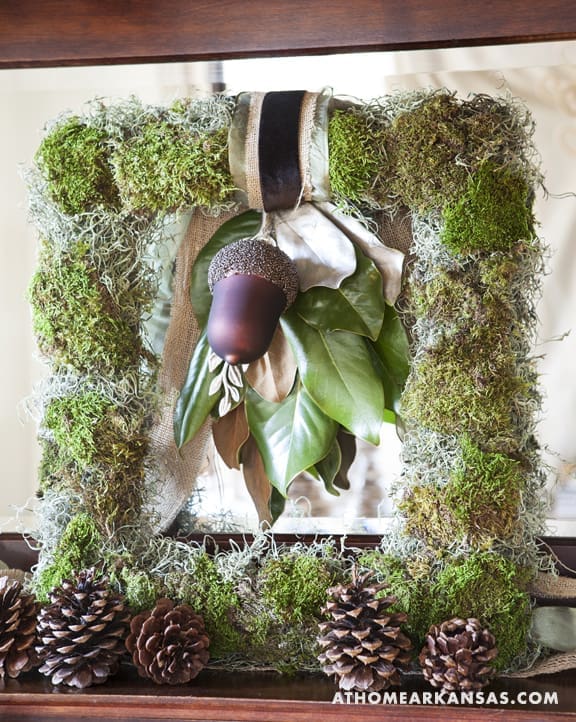
Moss Covered Display Frame by Angey Lyons
Supplies:
- 16 x 20-inch open back wooden frame
- 1 package Spanish moss—natural or basil color
- 2 (4-ounce) packages natural green preserved sheet moss
- Green-coated floral wire
- 4 (8-inch) black zip ties
- Hot glue gun
- Floral pins
- 4-inch wide burlap webbing
- 2-inch velvet ribbon
- 6-inch moss ribbon for hanging
- Fresh sprigs of magnolia leaves (look for unopened bloom pods for added depth and texture)
- 1-2 mercury glass ornaments in varying shapes
- Spray adhesive
- Clear crystal glitter
Instructions: Secure two zip ties to the top of the frame; pull tight, lock and trim excess. Separate and fluff the package of Spanish moss into manageable pieces. Using a hot glue gun, secure the entire package of natural Spanish moss to the front of the frame, covering all visible areas and overlapping the edges. Carefully lay out both packages of the sheet moss and survey the natural sizes and shapes for placement onto the frame. To achieve a formal look, fully cover the Spanish moss base in a smooth, consistent manner. To achieve a more natural look, apply moss in random patches, leaving some of the base visible. Use a hot glue gun to adhere the sheet moss to the base moss. Use floral pins to secure any loose pieces.
Create a hanging loop for the frame by cutting pieces of the moss ribbon, burlap webbing and velvet ribbon to twice the length of the hanging height. Layer the ribbon and loop it around the top portion of the frame, tying the ends at top in a square knot. Leave enough excess ribbon for trailing. Next, secure a bundle of magnolia sprigs with zip ties. Trim any excess. Lightly spray the bundle with spray adhesive and sparsely sprinkle with clear glitter. Wrap zip ties with jute twine to cover. Use green floral wire to hang sprigs and ornaments from the zip ties that were placed around the wood frame base.
Note: Moss frames will retain color longer when hung outdoors. If you choose to hang inside, lightly spritz with water every other day to counterbalance the indoor heat. Sheet Moss can be pulled off and replaced to refresh the frame. Consider changing out the suspended greenery with framed silhouettes for Valentine’s Day or suspend colored eggs for Easter.
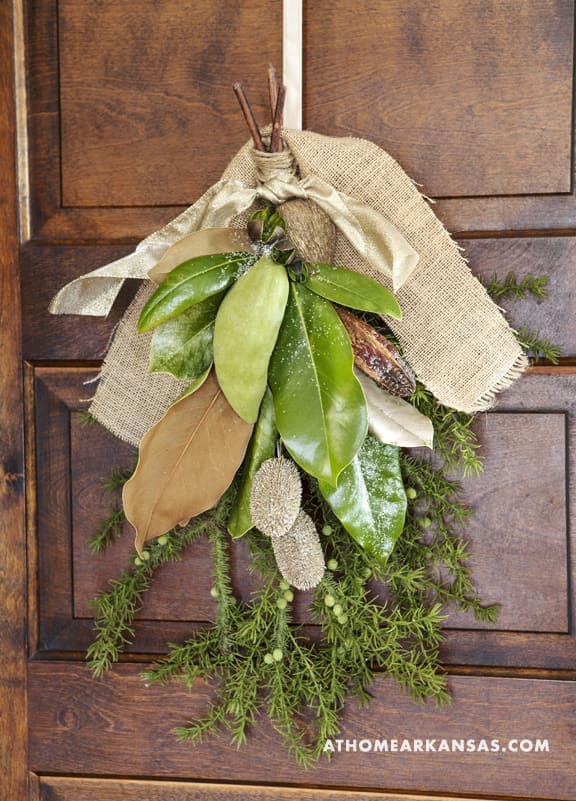
Evergreen Sprays by Angey Lyons
Supplies:
- Fine textured greenery sprigs, such as Hemlock or Juniper, approximately 18-inches in length and 18-20 inches wide
- Fresh magnolia leaves
- Magnolia cones
- Large dried seedpods, 2-3-inches in length
- Pecan shells
- Gold spray paint
- Clear crystal glitter
- Jute twine
- Burlap webbing
- Decorative wired ribbon
- Spray adhesive
- Hot glue gun
- Green florist wire
- Zip ties
Instructions: Spray a couple of magnolia leaves, magnolia cones and pecan shells with gold spray paint. Set aside to dry. Gather greenery sprigs by the branch ends, fan them out and secure with a zip tie. Layer fresh green magnolia leaves with spray painted leaves, fan them out, wrap with floral wire and thread through the zip tie to secure. Use a generous amount of hot glue to attach several large seedpods onto the stem ends of the magnolia leaves. Nest the natural and sprayed pecan shells between the large seed pods and magnolia leaves, filling in any large gaps; secure with hot glue. Lightly spray the entire wreath with adhesive and sprinkle with clear glitter crystals. Shake off excess. Wrap the branch ends with jute twine to cover the zip ties and floral wire. Tie layered burlap webbing and decorative wire ribbon around the branch base in a square knot, leaving enough ribbon to trail. Hang branch ends from a wreath hanger.
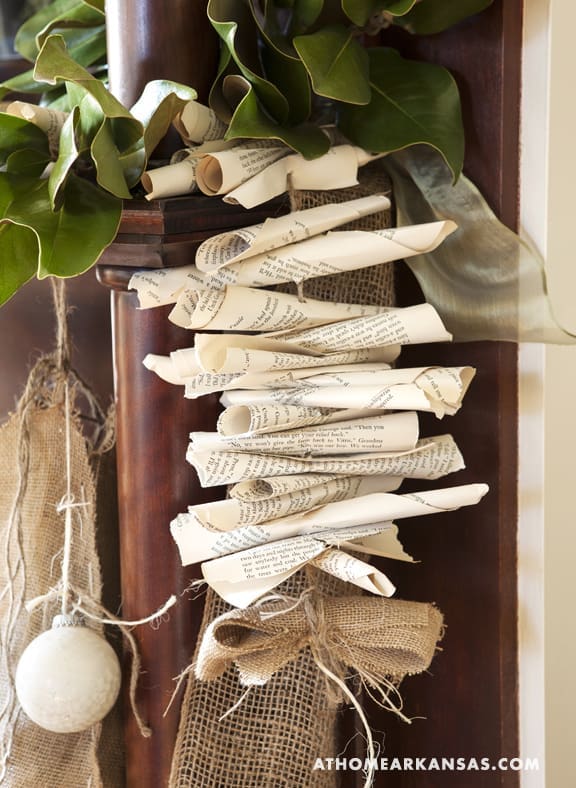
Book Page Garland by Sarah Savage
Supplies:
- Pages from old books
- Jute twine
- Large tapestry needle or small hole punch
- Scraps of burlap fabric
- Ornaments
Instructions: Cut a piece of jute twine to the desired length of your garland. One at a time, rip the edges of each book page, roll it up and punch a hole in the center using a tapestry needle or hole punch. To achieve visual interest, roll some pages horizontally, some vertically and some diagonally. Thread the jute twine through each page’s punctured hole. Repeat for desired length. Add ornaments intermittently by lacing and tying them onto the jute twine. Use scrap burlap to tie a bow or knot at the end of the garland.
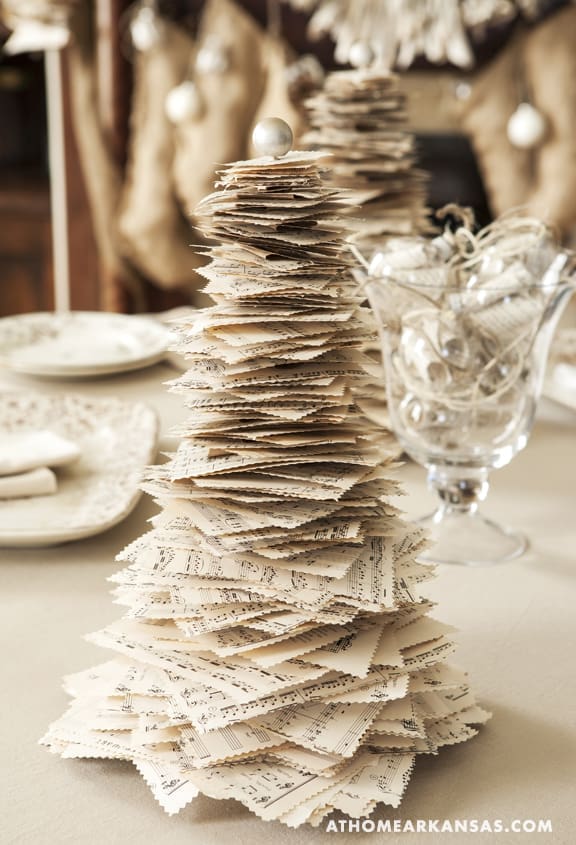
Sheet Music Tree by Aubrey Mitchell Pate
Supplies:
- Book of old sheet music
- ¼-inch x 24-inch wooden dowel
- 1-inch diameter wood finial with ¼-inch opening in the bottom to attach to dowel
- 4-inch diameter x 1-inch thick wooden base
- Champagne finish metallic spray paint
- Pinking shears
- Craft glue
- Drill with ¼-inch bit
- Bamboo or Metal Skewer
Instructions: Use pinking shears to cut out squares from the sheet music. You will need 30 squares in each of the following sizes: 12-inch, 10-inch, 8-inch, 6-inch, 4-inch and 2-inch. Use a bamboo or metal skewer to puncture a small hole in the middle of each of the paper squares. Drill a ¼-inch hole in the center of the wooden base. Glue the dowel into the wooden base and allow to dry.
Spray paint the wood finial, dowel and wood base and allow to dry. Starting with the largest squares and working up to the smaller squares, slide the paper squares onto the wooden dowel. Allow for space between each sheet and rotate each one so that the corners of the paper begin to flare out creating a circular form. When all of the sheets are installed and rotated, glue the wooden finial to the dowel and allow to dry.
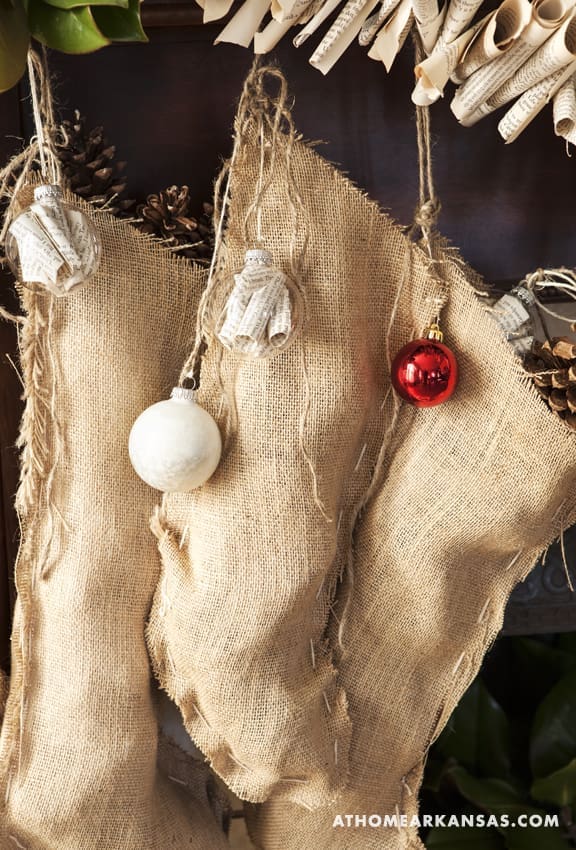
Burlap Stockings by Sarah Savage
(makes 6 stockings—4 large and 2 small)
Supplies:
- 3 yards of burlap
- Permanent marker
- Beading twine
- Packing twine
- Jute twine
- Large tapestry needle
- Newspaper or tissue for stuffing
- 3-4 pinecones per stocking
- 2-3 ornaments per stocking
Instructions: Using a permanent marker, draw a pattern on the burlap for a large and small stocking in your desired sizes and cut them out. Trace the patterns on the burlap until you have a front and back for each of the six stockings. Cut out the shapes and match the fronts and backs, facing traced sides inward so the lines don’t show. Use beading twine and a large tapestry needle to sew the two sides together. Use packing twine and jute to tie two or three ornaments to the upper corner of each stocking. Gently fill the stockings with newspaper or tissue to add fullness. For a finishing touch, top the stockings with pinecones that peek out of the top opening.
Book Page Ornaments by Sarah Savage
Supplies:
- Clear ornaments
- Pages from old books
- Packing twine
- Jute twine
Instructions: Rip a book page into roughly one-inch by five-inch strips. Roll the strips at a slight angle to achieve a cone-like shape. Gently remove the cap on a clear ornament. Insert three or four of the paper cones into the ornament and replace the cap. Finish by looping packing twine and jute twine through the ornament’s hanger to create a hanger.
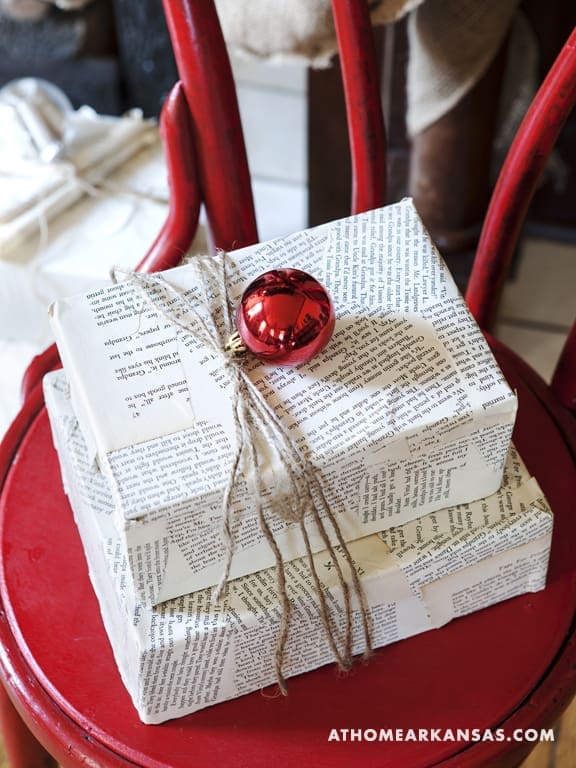
Book-Wrapped Presents by Sarah Savage
Supplies:
- Boxes of varying sizes
- Pages from old books
- Mod Podge
- Sponge brush
- Jute twine
- Ornaments
Instructions: Place a book page on the outer surface of your box. Dip a sponge brush into Mod Podge and apply it to the page to make it lay flat. Continue this step, overlapping book pages until the box is completely covered. Allow to dry completely. When multiple boxes are dry, stack them and tie together with jute twine. Add an ornament for an extra embellishment.
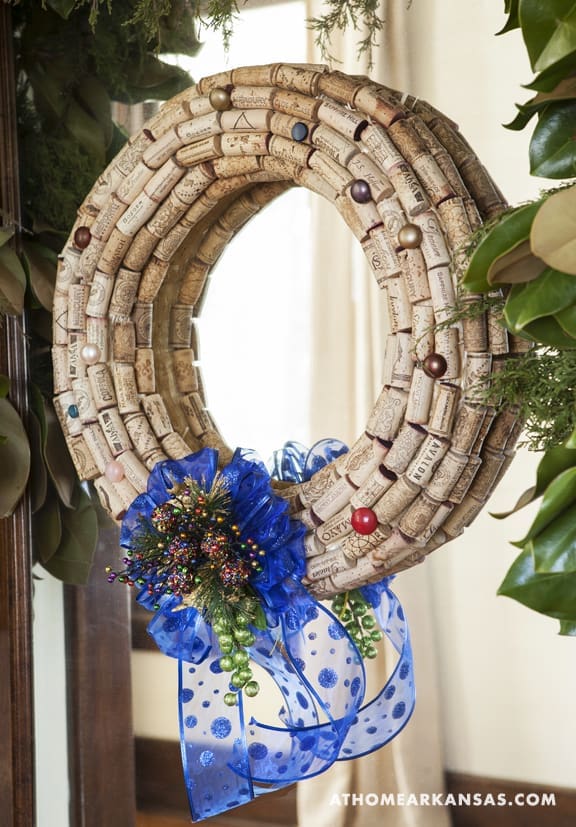
Cork Wreath by Julie Wait Fryauf
Supplies:
- Straw wreath form
- 1-inch to 1.5-inch long finish nails with small heads
- 1 mirror hanger
- A collection of 80-100 wine bottle corks
- Ribbon
- Additional décor as desired such as discs, buttons and vintage jewelry pieces
- Hot glue gun
Instructions: Pound the sharp end of a finish nail halfway into one side of each cork. Apply hot glue on all surfaces of exposed finish nail and press the exposed nail into the straw wreath. Continue in this manner to cover the entire wreath form. Using the same hot glue method, attach a mirror hanger with nail onto the back of the straw form for hanging. Use hot glue to embellish the wreath as desired with ribbon and other décor items.

Cork Christmas Garland by Julie Wait Fryauf
Supplies:
- Corks
- Small eye fasteners
- Small ornaments
- Beads with sizeable holes
- Thin ribbon
Instructions: Screw small eye fasteners into the ends of each cork. Use a 10-inch length of ribbon to loop into a bead, an eye fastener, back through the same bead, an ornament, a second bead, another eye fastener and back through the second bead. Tie ribbon into a bow. Continue this method to make a chain the desired length.
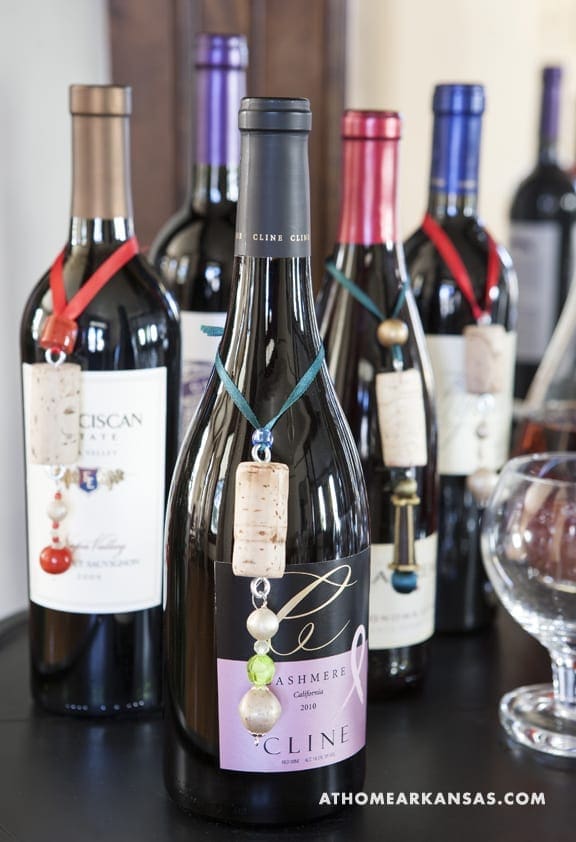
Cork Ornaments by Julie Wait Fryauf
Supplies:
- Corks
- Small eye fasteners
- Beads
- Jewelry findings (wire pins with a three-inch end)
- Tassels
- Thin ribbon
Instructions: Screw small eye fasteners into both ends of each cork. Attach several beads and a tassel if desired to one of the eye fasteners using the jewelry finding. Attach a ribbon loop to the eye fastener on the opposite end to create a hanger for the ornament. The finished ornament can be looped around the neck of a wine bottle gift, and later displayed on the recipient’s tree.
